Aircraft Propeller Installation Instructions
Congratulations on the purchase of your new Whirl Wind aircraft propeller – the very best there is! Your new Whirl Wind not only offers excellent performance and durability, but easy assembly and blade pitch adjustment as well.
To ensure years of trouble free service – READ and FOLLOW ALL DIRECTIONS. Failure to do so may lead to propeller failure.
WARNING: Propellers are dangerous. Use extreme caution anytime you are near the propeller — whether the propeller is turning or not. Failure to do so will result in severe bodily harm or death.
Installation Instructions
- Jabiru Ga-J2B Installation and Instructions
- UL260 GA-UL260-2B Propeller Installation and Instructions
- UL350 Ga-UL350-2B Propeller Installation and Instructions
- UL350 Ga-UL350-3B Propeller Installation and Instructions
- GA200CN and O200 Continental Aircraft Propeller Installation and Instructions
- GA200L Installation and Instructions
- GA300L Installation Instructions
- Typical Lycoming Flange and Drivelug Dimensions
- GA-200-816 Mounting Bolt Thread Engagement
- Rotax 912/914 RW3B Installation Instructions
- Rotax 915 R3B Installation Instructions
Whirlwind GA200L Propeller and Spinner Installation Video by Wasabi Air Racing
Tips and Tricks
Setting up reference marks for field changes:
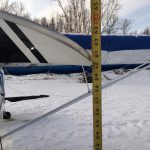
1. Start on level surface, measure up with tape, make sure both blades measure the same distance from ground to ensure the blades are horizontal and level.

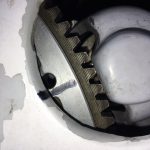
2. Use a marker and make a reference line on the starter ring and bring line to cowling or other reverence that will be repeatable.
3. Now rotate the prop 180 degrees and bring the next blade to the same measured distance from level surface as the previous blade and make another reverence mark.
Single hand pitch paddle operation:
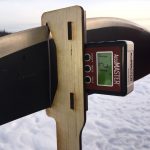
Most digital levels have a magnet incorporated in them. Attached a thin strip of steel to the level shelf with epoxy, this allows for hands free operation and better repeat ability.
Pitch paddle orientation:
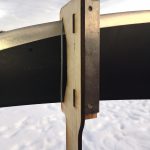
1. When the blades are horizontal and level, slide the pitch paddle on the blade and mark where it stops.
2. Remove the pitch paddle and use a level to draw a vertical from the mark.
3. This line will now serve as vertical reference.
Thanks to Israel Payton for providing pictures and tips.


